Iowa's weather has always been
unpredictable, but last week's highs hit 100 degrees and today we'll be lucky
to hit 70 degrees, a welcome change for me. This by far is my favorite time of year;
unfortunately, we don't have many days like this ahead.
Iowa can go from summer heat to
winter snow while winking at fall, as if to say, maybe next year you'll have a
chance to stick around. Our warm days and chilly nights will soon be replaced
with gray cloudy skies and dreary wet weather. The highs will soon only be in
the 50's, then 40's and before you know it, it will be -30 degrees and hell on
earth in my book, so today, we will bask in the sun, stuff our faces with
delicious morsels and attempt to work them off with some volleyball, croquet or
bad mitten.
Slow-Smoked Baby Back Ribs
My first attempt at smoking baby
back ribs was a disaster. I had just bought my cherished dual grill. Gas on one
side and charcoal on the other, but I had no idea what I was doing. I didn't
know about direct heat and indirect heat, nor did I know about the essential
water pan to add moisture to the smoking process and let's not forget soaking
your woodchips to avoid burning. I didn't know that either. Lastly, I didn't
know about the slow and low rule. I instead, grilled these expensive ribs at
about 400 degrees. Luckily I make killer BBQ sauce so they tasted okay if you
could get past the wood/rock like exterior. Who am I kidding? They were awful!!

I then educated myself by reading
every blog, article and website I could about smoking meats. This is what I
learned:
1.
Start with a great cut of meat.
Don't buy frozen, instead go to your butcher or meat department at your local
grocery and buy fresh!
2.
Remove your meat from the
refrigerator and allow to come to room temperature.
3.
Rinse your rib racks in cold water.
4.
If you're not going to hang your
ribs, remove the membrane off of the back. This is kind of tricky and does take
some practice, but well worth the time and effort in the end. A Phillips head
screwdriver seems to work the best. Insert the screwdriver in the center and
gently pry backwards until you can pull off the membrane. Use a paper towel as
the membrane is pretty slippery and allows better grip.

5.
Rinse and pat dry.
6.
Apply a thin coat of yellow mustard
prior to applying your rub. This will not give your ribs a mustardy flavor;
instead it works as a binding agent between the ribs and the rub you apply. A
rub is a mixture of spices you apply to your meat before you start the smoking
process. Rubs are generally applied 24 hours prior to smoking, but if you are
short on time, 30 minutes at room temperature will suffice.


7.
Soak your wood chips thoroughly! A
couple hours at least! I like to use hickory, apple and cherry for smoking
ribs.
8.
Get your smoker ready! If you have a
charcoal grill, like me, you can easily convert it to a smoker with a few items
and some know how. Smoking requires indirect heat, so arrange your coals around
your water pan which is directly under your meat. I like to have the coals and
wood chips on one side of the grill, but I have seen people smoke in the center
with coals on either side. As long as your coals are not under your meat, you
will be fine.

9.
Allow your coals to burn for at
least 15 minutes prior to adding your ribs. You want these ribs to cook SLOW
AND LOW, so it is important to make sure the temperature does NOT surpass 250
degrees. 200-225 degrees is your target temperature, so if you are burning too
hot, remove some coals and not burning hot enough, add some more. You will want
to start off with about 15 briquettes. I use a charcoal starter rather than
lighter fluid, so I don't have a chemical taint to my food. The cost is about
$10 for a charcoal starter and well worth it!

10. Once your grill is at the optimum temperature, add your
presoaked wood chips to the hot coals.

11. Place your ribs bone side down, making sure they are NOT
overlapping and are NOT anywhere near the coals. You can't undo crispy or burnt.

12. BE PATIENT! Resist opening the lid. Yes they are beautiful
and the smoking process is pretty cool to watch, but every time you open the
lid, you let out heat messing with your cooking time and progress.
13. Check the ribs for the first time after about 20 minutes.
Apply your mop sauce very thin and turn over. Repeat about every 30 minutes thereafter.
Each time you check you ribs, you MUST pay attention to the temperature. 15
coals are not going to cook these ribs all day at 200 degrees. You will have to
add more coals a few at a time as needed. It's important to utilize your
charcoal starter for this. Simply throwing on some briquettes will result in a
way too hot grill temperature.
14. 5-8 hours is how long these baby backs can take, sometimes
longer. When the meat starts to pull away from the bone easily, your ribs are
done. If you have a meat thermometer, you are looking for an internal
temperature of 205 degrees between the bones. I do NOT use a thermometer, not
even when making candy, but if you are new to cooking and are having guests you
want to impress, get one!
15. Wrap in foil and allow to rest once done. This will also
allow you time to finish up any side dishes you
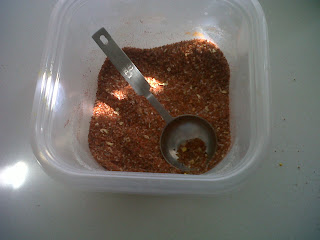
Rub Recipe
1/2 c. DARK Brown Sugar
1/2 c. Kosher or Sea Salt (NOT TABLE SALT)
1/2 c. Sweet Paprika
6 T. Black Pepper
2 T. Garlic POWDER (not garlic salt)
2 T. Dried Onion Flakes
2 tsp. Cayenne Pepper
Directions: Mix All Together,Thoroughly!
Mop Sauce Recipe
1/2 c. Apple Cider Vinegar
1/2 c. Water
1/2 c. Ketchup
1/2 c. Dark Brown Sugar
4 T. Yellow Mustard
2 T. Minced Garlic
4 T. Minced Onion
3 T. Olive Oil
1 T. Garlic Powder
1 T. Chili Powder
1 T. Onion Powder
1 tsp. Red Pepper Flakes
1 tsp. Cayenne Pepper
Directions: Combine all ingredients in a sauce pan and bring to a boil, then cool.
No comments:
Post a Comment